D7net
Home
Console
Upload
information
Create File
Create Folder
About
Tools
:
/
home
/
dateitor
/
public_html
/
vendor
/
erag
/
installererag
/
Filename :
README.md
back
Copy
## The Laravel installer is very user-friendly and easy to install. <p align="center"> <a href="https://paypal.me/teamdevgeek"> <img src="https://github.com/eramitgupta/server-commands/blob/main/%24-donate-ff69b4.svg"> </a> </p> InstallerErag packages can be easily installed with any Laravel project. They are designed to be user-friendly and simple to use. With InstallerErag, you can easily configure all the necessary configurations dynamically, including the minimum required PHP version, PHP execution, default Laravel folder permissions, .env file setup, and custom account form. Additionally, the package includes an automated database migration and seed process. 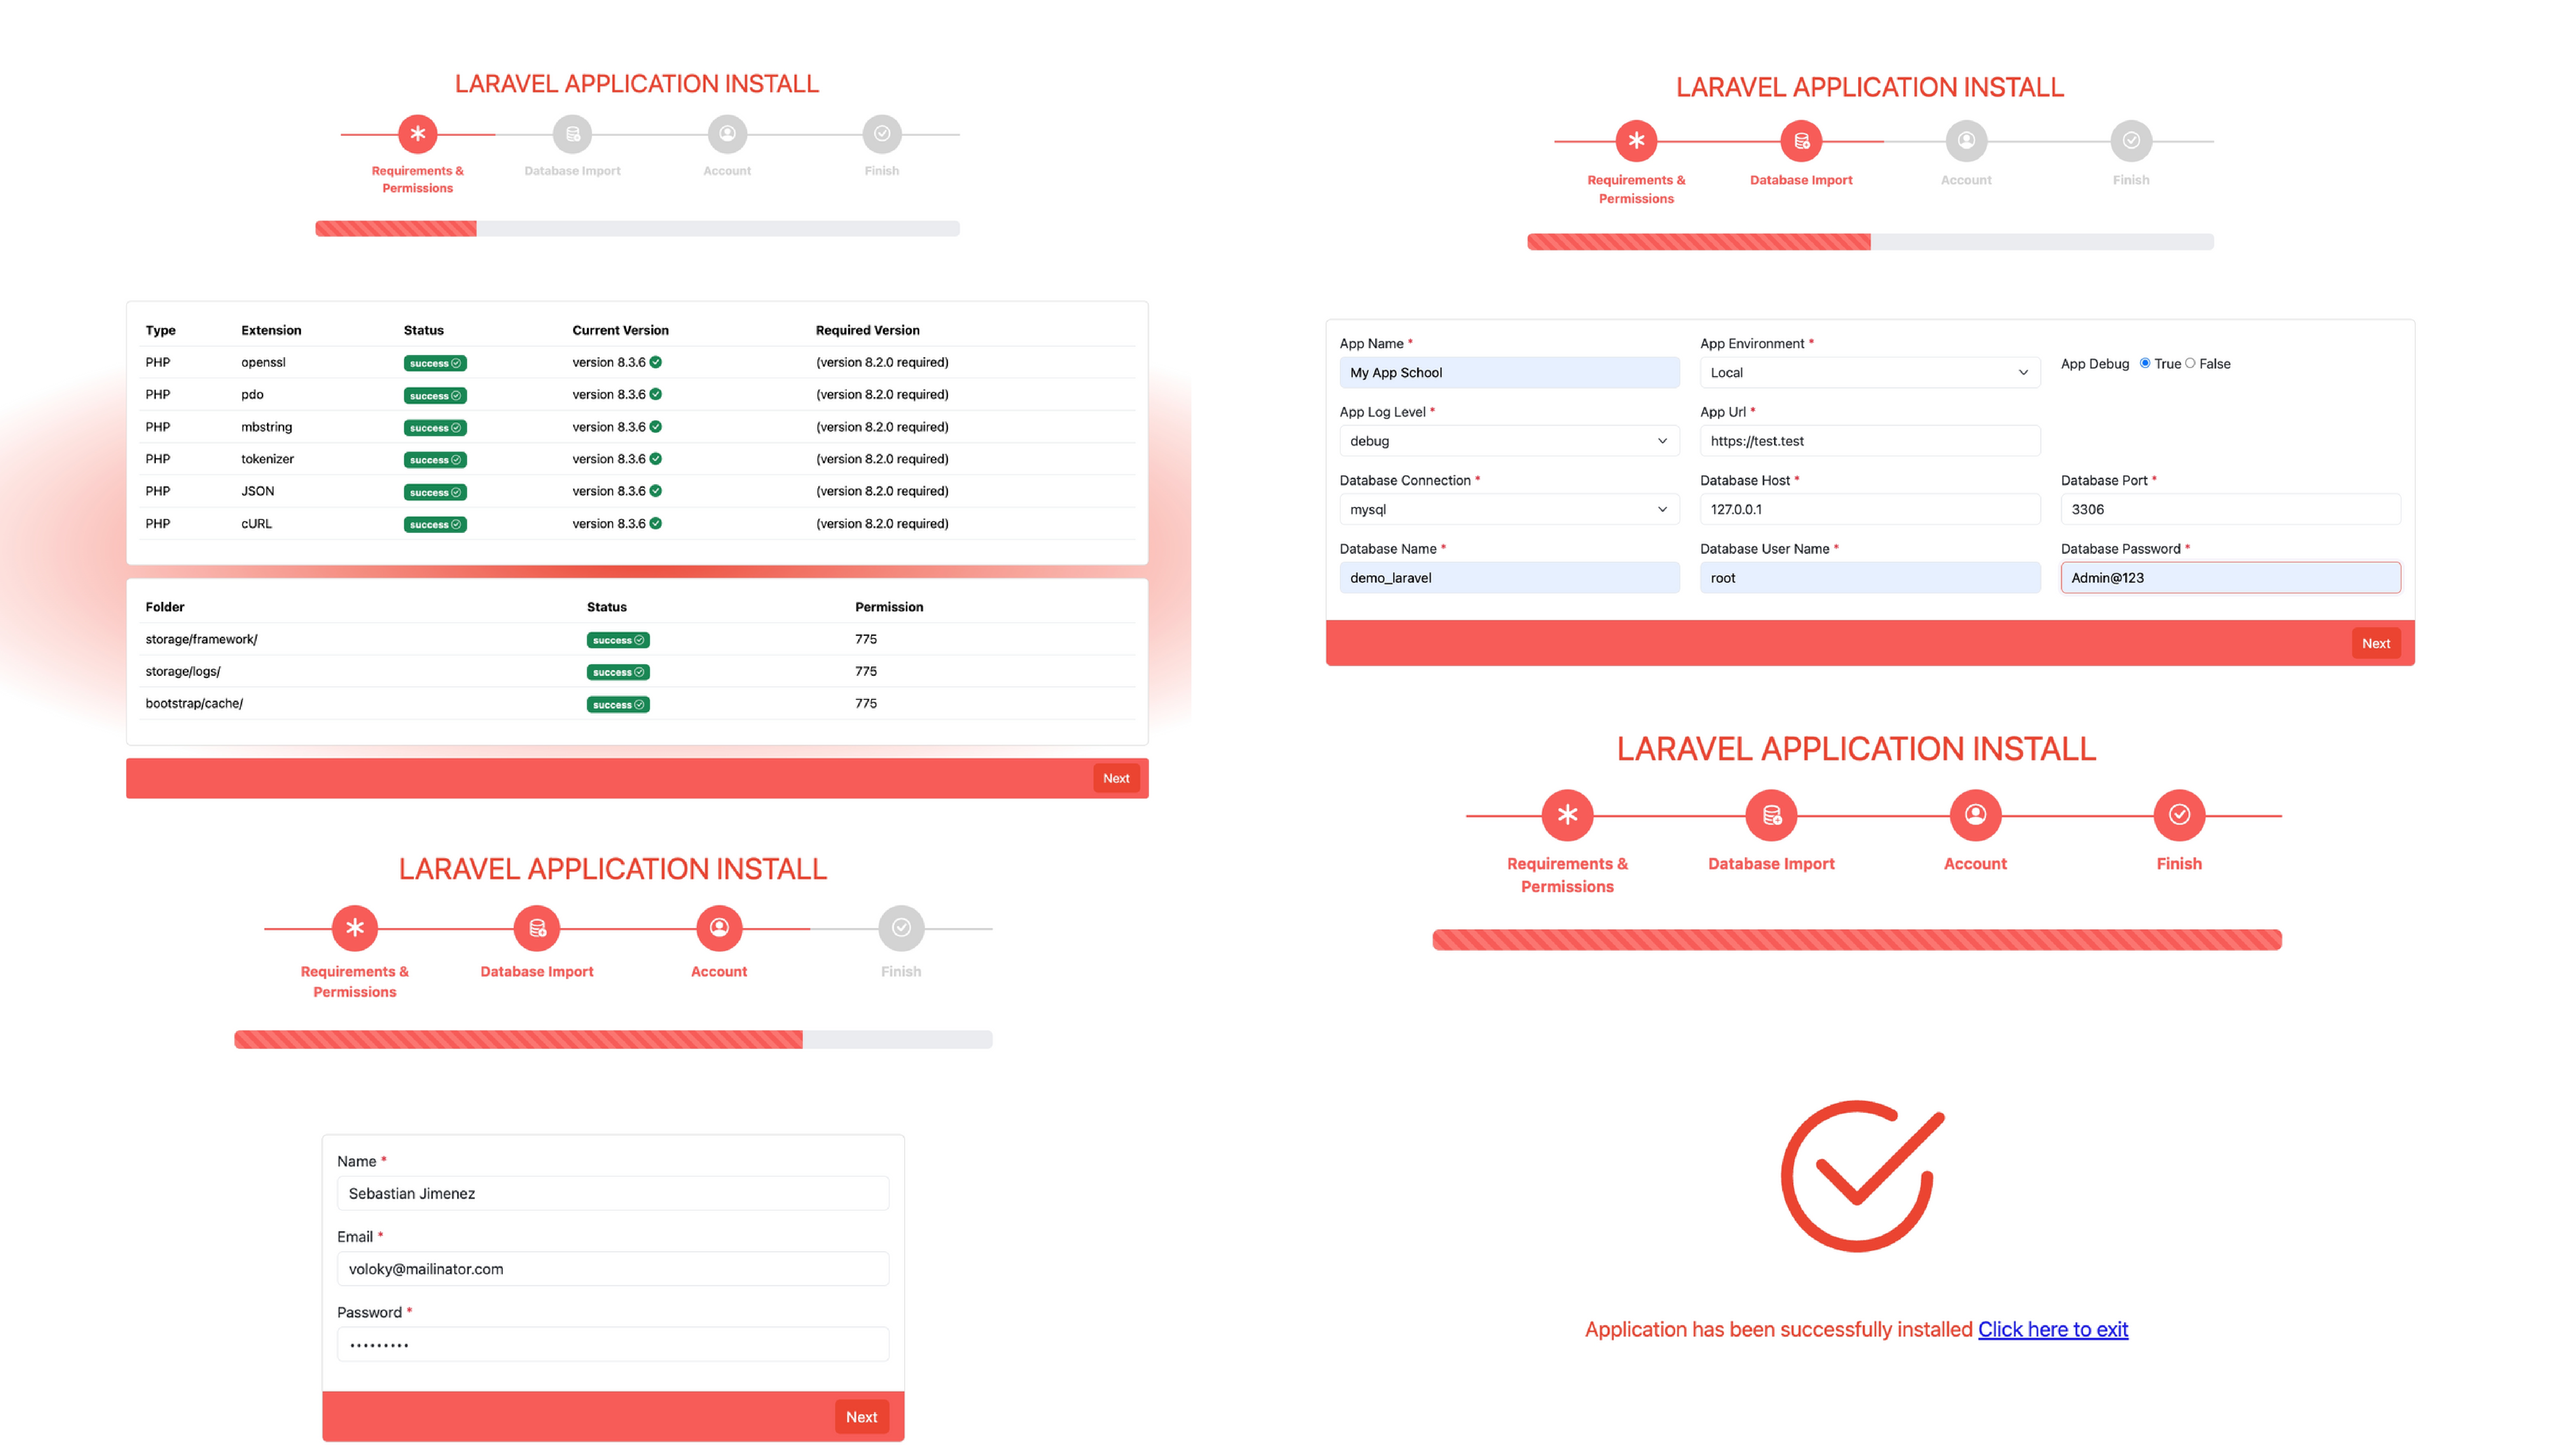 ## Getting Started ```bash composer require erag/installererag ``` ### Step 1 It seems like you are trying to include a service provider in your Laravel application. If you want to add the `InstallerErag\InstallerServiceProvider::class` to your Laravel application, you typically need to follow these Steps: Locate `config/app.php`: Open the `config/app.php` file in your Laravel project. Find providers array: Inside the `config/app.php` file, find the providers array. ```bash 'providers' => [ // ... InstallerErag\InstallerServiceProvider::class, ], ``` ### Step 2 ```bash php artisan vendor:publish --tag=InstallerErag --force ``` ### Step 3 Now start the installation ```bash https://yourdomain.com/app/install ```  ### How to customize Requirements and Permissions? Certainly! If you want just the content without additional explanations, here's the simplified content for your `yourProject/config/install.php` file. "requirements" => Add or remove additional PHP extensions as needed <br> "permissions" => Add or remove additional folder permissions as needed ### How to add new .env variable dynamic ? If you want to create an additional `.env` file based on the configuration in the `yourProject/config/install.php` file, you can follow these Steps: We will be displaying of `.env` Within the same, you need to include the following.<br> The last line, which ends with `.`, followed by a new line character `\n`, will not persist. Ex: ```bash 'needed="34dsf24bcgf"' . "\n". 'apikey="123456"', ``` ### How can I insert dynamic extra fields to the Account form? When you go to the path `resources/views/vendor` you will see `account.blade.php` By modifying it, you can add extra fields like this. ```bash <div class="col-md-12 mb-3"> <x-input label="Phone Number" required="ture" name="phone_number" type="text" value="{{ old('phone_number') }}" /> <x-error for="phone_number" /> </div> ``` After adding, you need to go to `yourproject/config/install.php` where the input tag name will be, and add it to the account array inside `install.php` like this ```bash 'account' => [ 'name' => 'required|string|max:255', 'email' => 'required|email|unique:users|max:255', 'password' => 'required|string|min:6', 'phone_number' => 'required', ] ``` ### Screencasts (Video) ```bash https://drive.google.com/file/d/1kqzdLvMZGUIJGCi214jB91jsDOM4UKl0/view ``` ### Step 1:  ### Step 2:  ### Step 3:  ### Step 4:  ### License The MIT License (MIT). Please see License File for more information. > GitHub [@eramitgupta](https://github.com/eramitgupta) · > Linkedin [@eramitgupta](https://www.linkedin.com/in/eramitgupta/) · > Donote [@eramitgupta](https://paypal.me/teamdevgeek/)